Form 1 (New and Existing Assets)
This form accommodates new and existing assets. It is selected at the User Preferences screen (see "Mobile Android Asset Inventory").
Form 1 Aspects
Use Form 1, to perform asset inventory for an entire location. When you enter the asset inventory location, you will notice four aspects to this form:
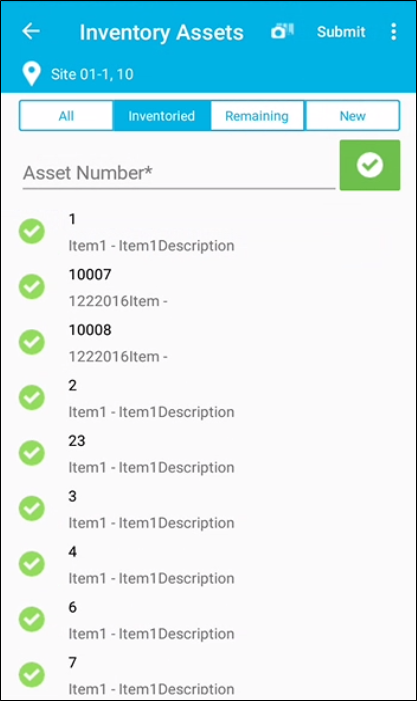
- All: all assets that are already inventoried at this site-location. When an asset is inventoried, a green check mark appears to the left of it.
- Inventoried: as you inventory an asset already inventoried at this site-location, the asset is added to the inventoried list.
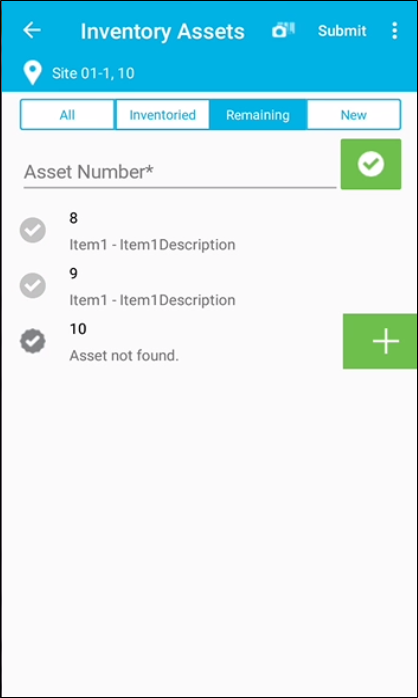
- Remaining: the asset or assets that remain to be inventoried at this site-location; based off all assets already inventoried at this site-location are listed. As an existing asset is inventoried, it is removed from this list.
- New: the amount of new assets inventoried in this site-location during this inventory session. The assets in this category are either existing assets in the system not found in inventory or new assets in the system. An existing asset must be added to the site-location. A new asset must be created and then added to the site-location.
You may perform an inventory on all of the assets for this location in one session when you use Form 1. As you scan the assets, they are categorized as either inventoried or new.
Important: Any NEW assets that are scanned during this inventory session must be added to an asset item. After the asset is added, it is placed in the Inventoried list.
When you are finished with this inventory session, press Submit to perform the asset inventory. All assets found in the inventoried list are submitted and inventoried.
Steps to Perform an Asset Inventory with Form 1
The steps below outline how to perform an asset inventory count with Form 1. This form type is selected in the User Preferences form.
- Select Home > Inventory > Assets .
- The Inventory Assets form appears.
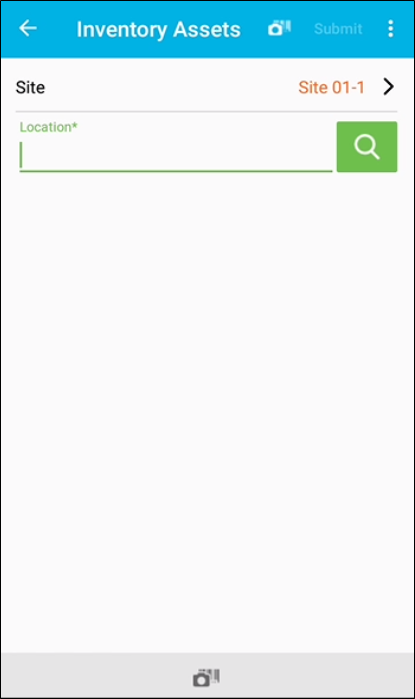
- Site: The default site of the logged-in user is automatically selected in the Site field. An asset inventory may be performed for a location at this site. If the logged-in user has access to another site, it will be available in the Site form and may be selected.
- Location: To perform an asset inventory count for a location at the selected site, scan or enter a valid location in the Location field.

- Location field\Search icon: tap the search icon to search for assets at this location.
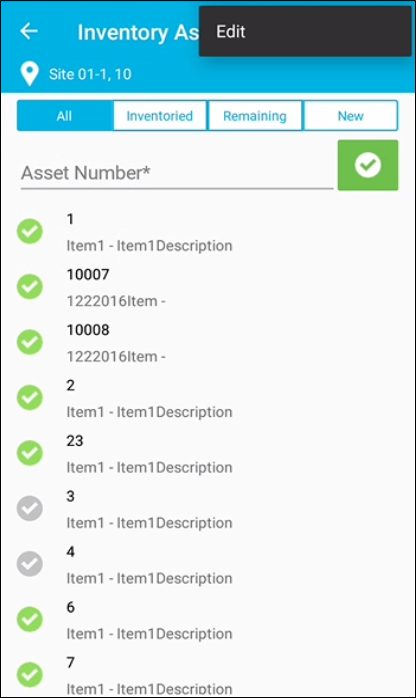
- The form refreshes. It contains the following options: All, Inventoried, Remaining, New.
- All Section: All assets that are inventoried at this site-location are listed in the All section of the form. (If this location does not have assets, this section will be blank.)
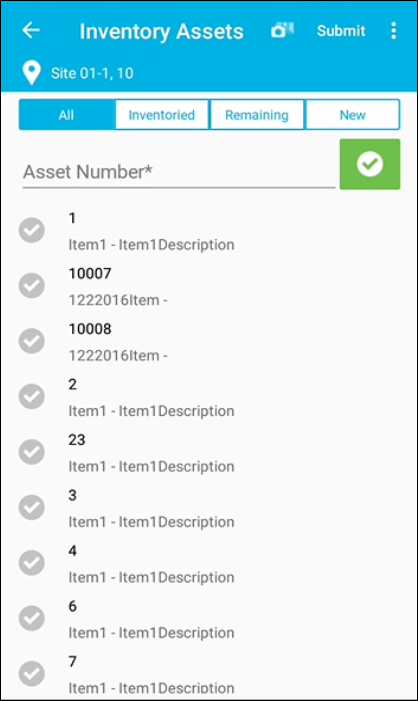
- Asset # field: enter the asset number in this field. Tap the Check mark icon to place this asset in inventory.
- Asset Resides in this Location: If the asset is located in this location, it is placed in the All list and the Inventoried list; a green check mark is to its left. It is removed from the Remaining list.
- Asset Resides in Another Location: If the asset is located in another location, it is placed in the All list, the Inventoried list, and the New list. When the asset inventory is submitted, this asset will be moved into this location. It is placed in the All list and the New list. In each list, it contains a green check mark to the left.
- Asset Is New (does not exist): If this asset is new, when the asset inventory is submitted, the asset will be added to an asset-type item and to this location. The asset is placed in the All list and the New list; it contains a gray check mark to the left and an add icon to the right.
- When you are finished adding the assets to this location, you are able to view the inventoried assets, remaining assets (not accounted for during this inventory session), and new assets that pertain to this inventory session, by tapping each section.
- All: To view all assets found in this location, tap the All section.

- Inventoried: To view any assets inventoried during this session, tap the Inventoried section. This is a view-only form that lists the assets that have been added to this location during this asset inventory session.
- Remaining: To view the assets at this location that have not been inventoried during this session, tap the Remaining section. If the asset is new, it contains an Add icon to the right and the description, Asset not found, underneath it.
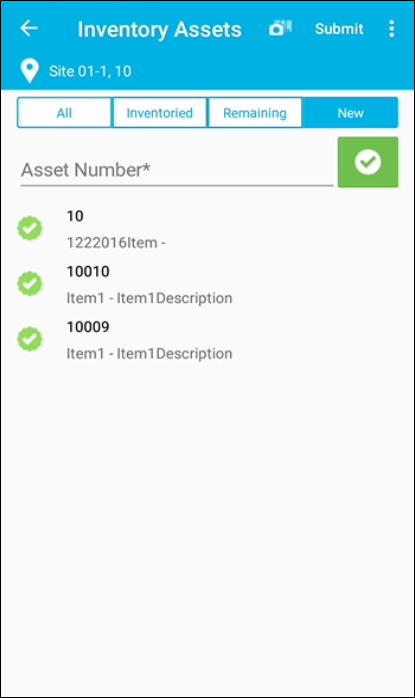
- New: To view assets added to this site-location, tap the New section.

- An existing asset not found in this location has a green check mark to the left. It will be moved into this location when the asset inventory transaction is submitted.
- A new asset (not yet added to the system) is denoted by a gray check mark to the left of it and a green Add icon to the right in both the Remaining section and the New section. Because it is not linked to an asset-type item, Asset Not Found is found underneath it, instead of its asset-type item number. Tap the Add icon to add this asset to an asset-type item at the Select Item form.
- Select Item form (new asset only): Select the asset-type item for this asset.
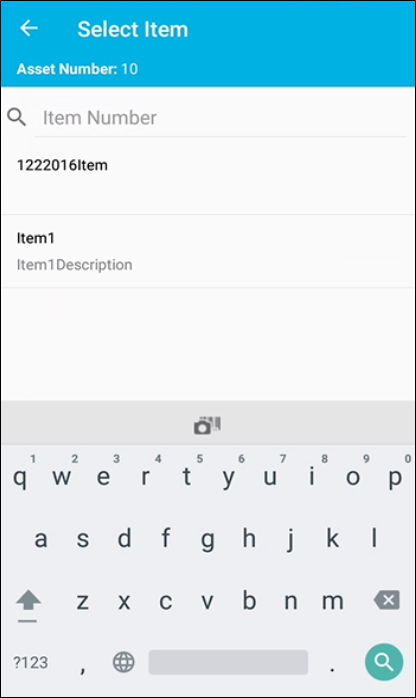
- If the asset-type item uses RFID, the RFID Tag# form appears; you may add an RFID tag number to this asset in the RFID Tag# field (optional). Press Done to close this form and return to the Inventory Assets form.

- You are returned to the Inventory Asset form in either the New or Remaining section. The asset is now listed with its asset-type item number and a green check mark to the left of it. It is also placed in the Inventoried list.
- The Options icon found to the right of the Submit icon contains an Edit option. Select to discard all changes in this inventory session. A prompt appears: Discard changes. To cancel this session, select Yes to close the prompt and return to the main form.
- When you are finished with this asset inventory session, tap Submit in the top right area of the form. All assets in the Inventoried list are processed and placed in the asset inventory for the site-location selected. You are notified with a message: Submit request submitted successfully.